
| Introduction | | | Prepare for installation | | | Install | | | Browser config | | | Statistics | | | Future Development | | | Credits | | | License | | | Download |

After downloading ZyMS, you can decompress the archive containing the appliance. The most relevant file is Ubuntu.vmx. Double-click
the file to start the VMware player.
Probably, you get a popup window like the one depicted.

VMware player popup window
Choose I copied and press OK

When the boot process ends, you get a window like the one depicted.

Login
Before continuing two instructions:
- by clicking with your mouse in the appliance windows, you "enter" the appliance
- when in the appliance, by pressing Ctrl+Alt you return to your PC
Press enter several times (just to scroll up the last boot messages). ZyMS asks you for a username and a password. As described in the README.txt file the username is toor and the password is password.

Once you logged in, you can start configuration of the ZyMS appliance by entering the command zyms.

zyms command
This script guides you in configuring the appliance. As it needs root privileges to perform some operation, you have to enter the toor password to run the script as SuperUser.
The first configuration step is related to your keyboard. the script asks you if you want to configure your keyboard. If you enter 1 the keyboard configuration section starts otherwise you skip this step
(this is true for every step of this configuration scripts; at any moment, by pressing Ctrl+C, you can stop the script).

sudo
By selecting 1, the keyboard configuration starts.

keyboard configuration
When keyboard configuration ends, the scripts proposes the configuration of your timezone. By choosing 1, the timezone configuration section starts.

timezone configuration
When timezone configuration ends, the scripts proposes the configuration of the default toor password. By choosing 1, the change password dialogue starts.

password dialogue
When the password change dialogue ends, the zyms scripts shows the next step related to hostname configuration.

hostname configuration
You can choose you favourite hostname (you can also skip this step). After inserting the new hostname,
the scripts shows the value you entered. By choosing n, the script restart asking the needed values; while, by pressing y,
the scripts proceeds with system configuration. This section configures the /etc/hostname and the /etc/hosts files
with the value entered.
By finishing hostname configuration, the scripts enters the section related to networking. In this section, you have to enter the parameters determined for the ZyMS
appliance.

networking configuration
The script asks for IP address, Netmask and Default Gateway values and generates the /etc/network/interfaces file,
containing eth0 configuration.
Then, the DNS configuration section starts
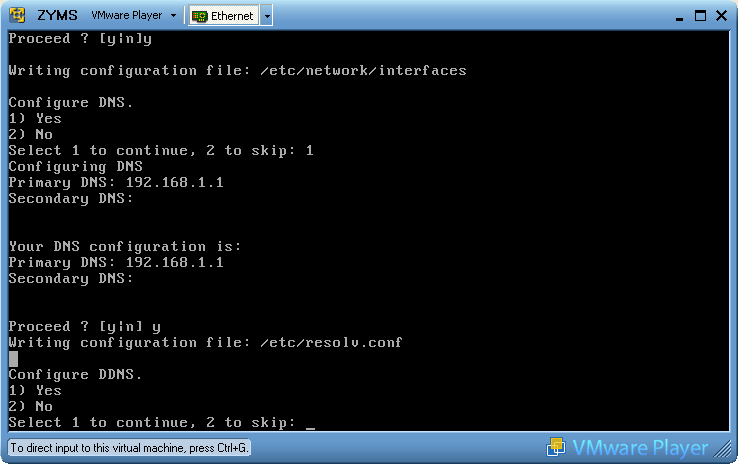
DNS configuration
Enter the Primary DNS IP address and, if available, the Secondary DNS. By accepting the entered values, the script generates the /etc/resolv.conf file.
Then, the zyms script enters the Dynamic DNS section. As you already know from the Prepare for installation section, this step is optional.
You have to perform this step if your public IP Address is a dynamic one.
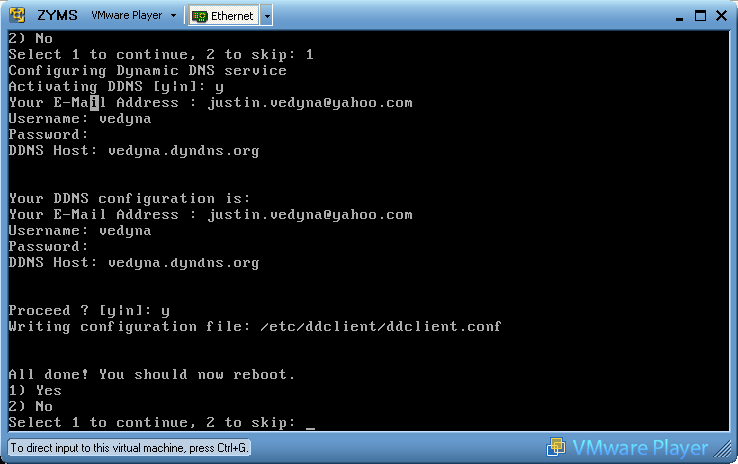
DynDNS configuration
The script collects all the information needed to configure the DynDNS client (email, username, password and host from your DynDNS account) and
generates the configuration file /etc/ddclient/ddclient.conf.
After DynDNS configuration, the scripts asks you to reboot the appliance. Choose 1.

After the reboot process, you can perform the following steps from the appliance to verify correctness of the basic configuration.
- ping your default gateway (e.g. ping 192.168.1.1) to verify ethernet configuration
- ping an Internet host (e.g. ping www.google.com) to verify DNS configuration
- lookup your DynDNS host(e.g. nslookup vedyna.dyndns.org) to verify DynDNS configuration
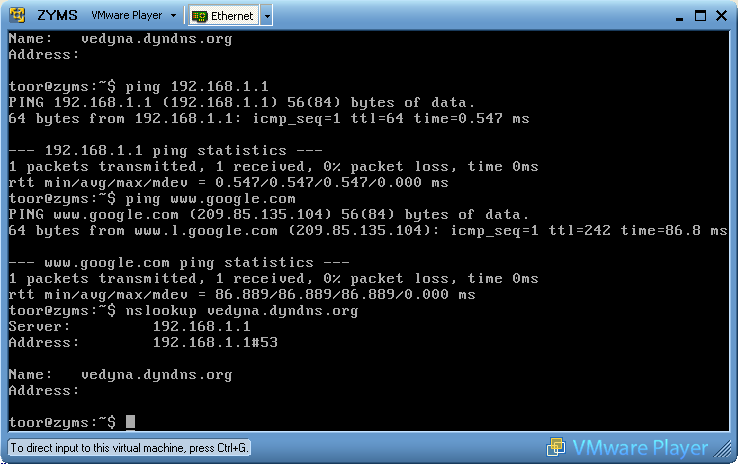
Checking basic configuration

The RabbIT proxy is a Java application, so you need to install Java Runtime Environment in the ZyMS appliance.
From the ZyMS window, run the command jinstall.
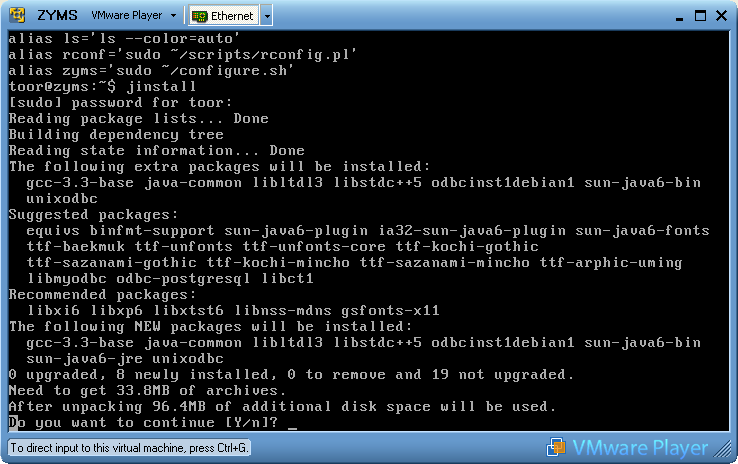
Java installation
By pressing Y, the Java package is downloaded from the Ubuntu repository.
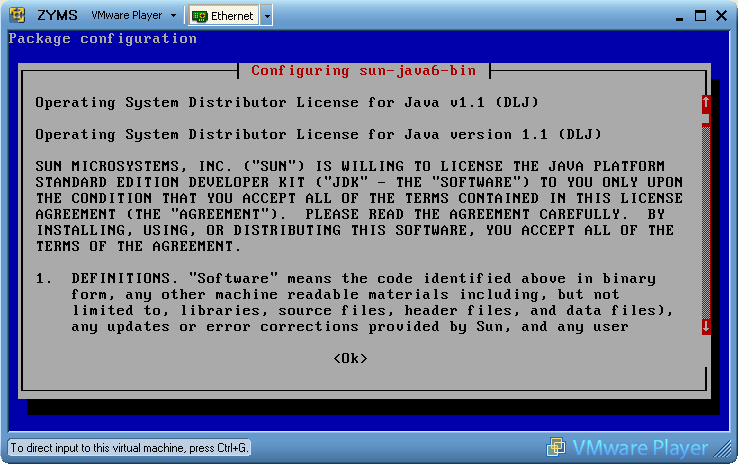
Java installation
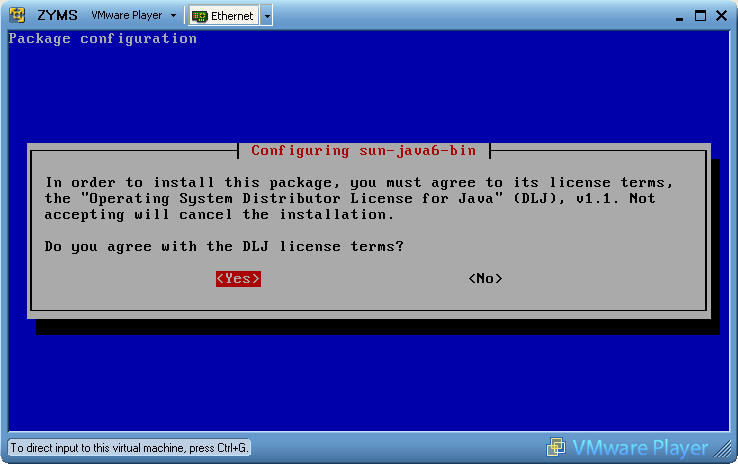
Java License Agreement
As depicted in the previous images, you have to accept the SUN license agreement to proceed with package installation.

The last configuration step is related to the RabbIT proxy.
From the ZyMS window, run the command rconf.
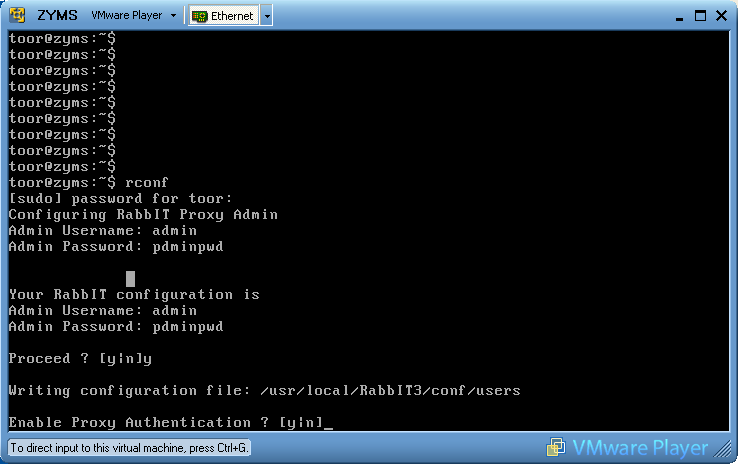
RabbIT proxy Admin parameters
As depicted, you have to choose the credentials for the RabbIT administrator.
By pressing y, the /usr/local/RabbIT/conf/users file is created with the values you entered.
Then, the script asks for Proxy Authentication configuration. If you answer n, no proxy authentication is configured and the script ends.

RabbIT Proxy Authentication
If you answer y, you have to enter credentials for proxy authentication. By accepting the entered parameters, the /usr/local/RabbIT/conf/allowed file is created with the values you entered.
After this step, reboot the appliance by issuing the command sudo reboot

| < Prepare for installation | Browser configuration > |